Paper plate arts and crafts are a great way to pass time on a rainy afternoon. It’s amazing how a simple paper plate can be turned into so many different things, and with supplies that you probably already have!

Emojis

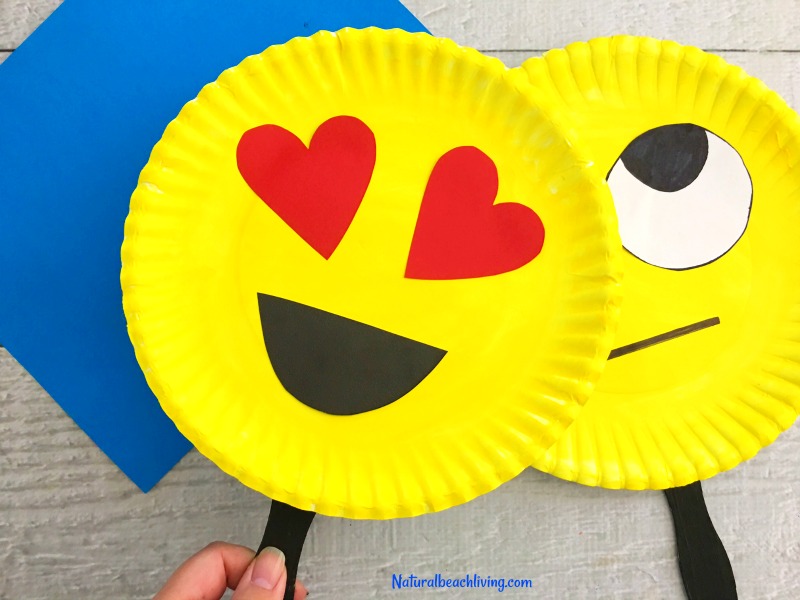
These emojis are a really cute, and easy paper plate arts and crafts idea.
You will need:
- Paper plates
- Paint
- Foam paintbrush
- Glue
- Lollipop sticks
- Coloured cards
Method
- Paint the plates yellow with the foam paint brush. This will make it easier for little hands to cover the whole plate with paint.
- As it dries, paint the lollipop sticks black, and cut some shapes out of the coloured card.
- When the sticks and the plates are dry, glue faces, emotions, and emojis on the plates. Then attach the black sticks.
Llama Paper Plate Craft

This llama paper plate craft is adorable, and really easy for you to do with your little one.
You will need:
Paper plates
Acrylic paint
Paintbrushes
Scissors
Glue
Pencil
Method
- Cut the paper plate in half, and set one half aside. This half will be the body.
- Use the cut edge of the half plate, and draw a llama head and neck shape. Cut it out. Use the rest of the half plate to cut out four legs, and a teardrop tail shape.
- Glue the legs, tail and head on to the half plate you set to the side. Leave to dry.
- Paint on your design. You can use any colours and any design you want.
Dinosaur Paper Plate Arts And Crafts

Dinosaurs are always a big hit, and what could be better than these cute, easy to make dinosaur paper plate arts and crafts?
You will need:
Paper plates
Paint
Paintbrushes
Coloured card
Toilet paper roll
Black marker
Scissors
Method
- Cut the paper plate in half.
- Paint each half in a different colour.
- Cut the toilet paper roll in half. Paint to match the paper plate halves.
- Make two slits on the toilet paper rolls, and slide the paper plate into these slits. These are now the legs.
- Cut out a dinosaur head and tail from the coloured card. If you don’t have coloured card, you can paint white card in the colour you want, or you could use a cardboard cereal box.
- Glue the head and tail in place on the paper plate. Draw on an eye and a mouth.
- Make sure that your dinosaur is dry, and then you can decorate it. Paint on some spots using a foam paintbrush, or make your own using a pom pom and a clothespin.
- Let your little one run wild with the decoration. You can add googly eyes, interesting patterns, or you could even cut out spines and make a spinosaurus, or a stegosaurus.